Saturday, December 11, 2021

AndroidStudio Development with an M1 Mac


I got to use an M1 Mac as a loaner while my other Mac (2019, 32GB, MBP) was in the shop. So I used Time Machine to restore my work on the M1 MBP with 16GB. This M1 really is impressive in performance and using less power.  Having half the RAM of the Intel Mac wasn't noticeable at all.

Everyone should ditch their Intel and get one of these! That said, there are two impediments I had with getting work done: Android Studio and Open Broadcast Studio.  In this article I'll share how I resolved my issue with Android Studio.

The Issue 

Everything worked "out of the box" with Arctic Fox patch 4 (not a native M1 app), except I still couldn't get the emulator to launch.  But it actually was pretty easy to resolve once I learned a bit more about how Android emulation works.  

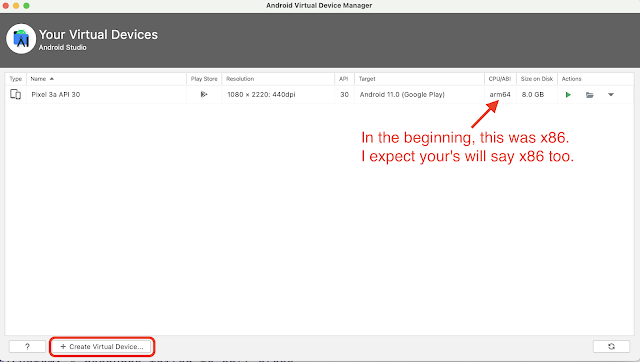
When I chose to launch my app, nothing would happen.  What was happening in my case is that it was trying to launch an emulator based on the x86 architecture.  So I needed to change the emulator.  The following is how. There are articles on StackOverflow, Reddit, and Medium but as AndroidStudio frequently releases new versions, a lot of the information is educational but the steps are quickly out of date.  (We are speeding toward the Singularity after all.)

Changing the Virtual Device

Note: As you go through the below images, you'll notice they are a tiny bit fuzzy. This is a compromise to get these big screenshots to fit in this webpage's layout. If you can't read something clearly, click on the image and it'll expand to full size and everything will be clear.

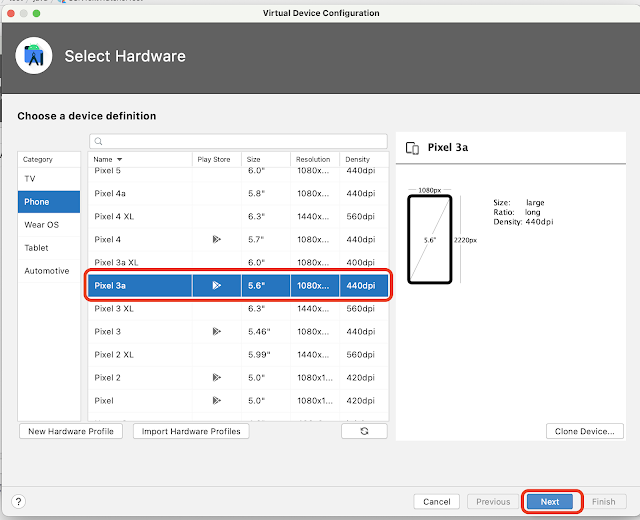
Go into the Android Vertical Device manager (AVD).


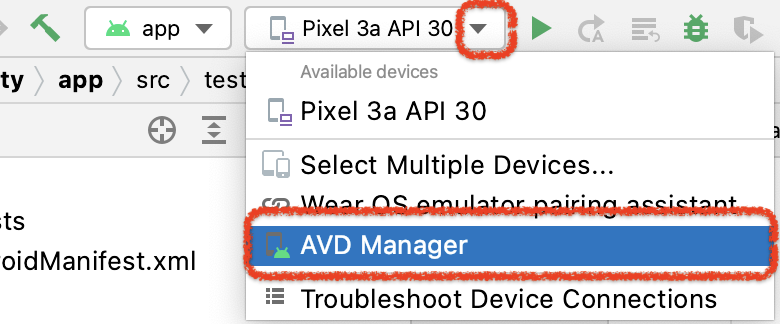
Create a new virtual device. 


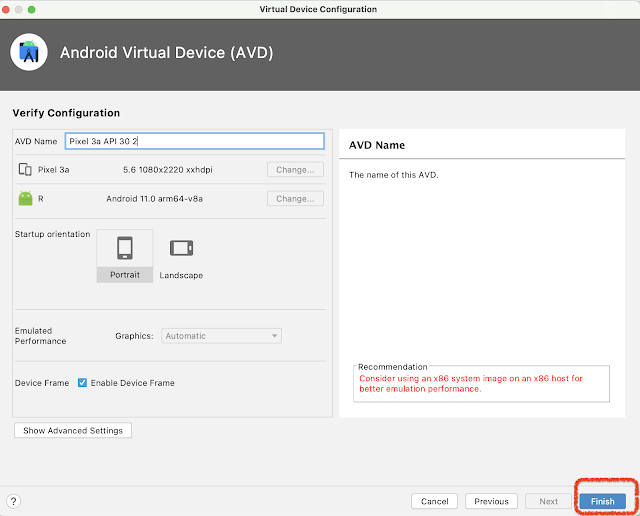
Select the same phone type you were using before (I'm using Pixel 3a).


Download the version of Android OS you need (notice the ABI is for ARM).


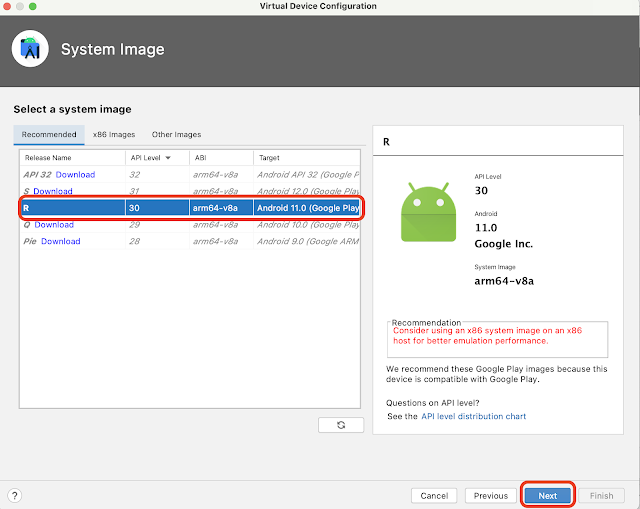
Select the ARM emulator.  (Remember, Apple Silicon is an ARM architecture.)


After clicking finish you're ready to go back to AndroidStudio and launch the app in the emulator. (It will take more time on the first launch as it doesn't have things locally cached.)

Cleanup

When you're happy with the results of the new virtual device, go back into the Android Virtual Device manager and delete your old, unusable device and free up those GBs of storage.

Friday, April 16, 2021

Code Craftspersonship with S.O.L.I.D. (SOLID) for Java, Swift, Kotlin


Code craftspersonship is important as it is what allows code to be adjustable in the future. If it's not adjustable, then you're assuming that you're only releasing ONCE, and who does that? If software is valuable, then we'll keep adding more features the market would like. So it's the job of a professional developer to enable this ability, otherwise, what you are delivering is not as valuable after the first release.

A popular model introduced by Bob Martin in Clean Code is S.O.L.I.D.


Learning how to put SOLID to work and then teach your team will bring a lot of value to your software and organization. Here are resources I recommend for individuals and teams to learn how to apply SOLID to Java, Swift, and Kotlin. (I'll add more as they come up on my day job as a technical coach.)

Language Agnostic Materials

This introduction teaches with cartoons and is my favorite resource on this whole page!  


This next is a slide deck that teaches with CRC diagrams: https://www.slideshare.net/sjabnouni/solid-code-by-example

If you want more details, Code magazine has a very nice article by Derick Bailey that shows how a project starts with something simple and evolves into something requiring more design: https://www.codemag.com/Article/1001061/S.O.L.I.D.-Software-Development-One-Step-at-a-Time

Java


Swift


Kotlin


https://www.slideshare.net/ionutbilica/solid-design-principles-applied-in-java

Thursday, January 7, 2021

Zoom Screen Sharing freezing on MacOS


You're all set. You've got the best presentation ready. Your green screen is shiny and your new pinstripe T-Shirt displaying the M1X logo on the chest is well pressed and lightly starched and you're totally killing it on your 4K webcam, but then one of your participants says, "Oh?  Did you change slides? Your screen sharing is frozen."  

OK.  So you close the sharing and turn it on again and it goes even worse: "Now it's a blank screen."

A NIGHTMARE! And you KNOW your hard wired connection to gigabit ethernet can't be the problem. And they say your are looking GOOD on the webcam. That means this is a screen sharing problem.

Here are some things that worked for me if you're living this nightmare:

Of the following two steps, doing the steps in #1 didn't resolve the issue.  Doing the steps for #2 did.

  1. learn about your Mac's ability to switch video card, know how to identify what card it's using, and configure it to not switch when connected to power.
  2. configure Zoom to avoid the situation
I included the steps of #1 because:
  • sometimes more knowledge will save your bacon, 
  • I wanted to capture these notes, and 
  • if you're a live streamer like me (TDD.Academy Youtube, TDD.Academy Twitch), you may need to "amp things up" to increase your frame rates for your live stream.
It's possible after some time and experience, that I'll go back to #1 and allow my machine to automatically switch video chips while connected to power.  But for now, I've some experiments to try out.

Did you know your Mac could have more than one graphics processor?

Go to your battery settings to see if your Mac has "Automatic graphics switching." If it does, you've got more than one graphics processor.  Here are the steps:


If you're curious about which GPU your machine is using at any time, either open Activity Monitor or click on the apple icon in the menu bar and select "About this mac."  Activity Monitor will tell you if they are using the "high performance" card or not.  About this mac will tell you which GPU (Graphics Processing Unit) is active. Typically the low power GPU is from Intel and the high performance one is from Radeon or Invidea.


To change or turn off the ability to switch GPUs, your can deselect the "Automatic graphics switching." I did this for when my machine is running on power.  I want it to select to the low power GPU when it's running on battery.  When I'm presenting my best face to the world, I'm usually connect to battery and hardwired to the LAN.

Zoom settings that solved this problem

Zoom has two interesting settings.  One of which, I'm sure resolved my problem.  Go into Zoom preferences and turn them both on if your having issues.