I got to use an M1 Mac as a loaner while my other Mac (2019, 32GB, MBP) was in the shop. So I used Time Machine to restore my work on the M1 MBP with 16GB. This M1 really is impressive in performance and using less power. Having half the RAM of the Intel Mac wasn't noticeable at all.
Everyone should ditch their Intel and get one of these! That said, there are two impediments I had with getting work done: Android Studio and Open Broadcast Studio. In this article I'll share how I resolved my issue with Android Studio.
The Issue
Everything worked "out of the box" with Arctic Fox patch 4 (not a native M1 app), except I still couldn't get the emulator to launch. But it actually was pretty easy to resolve once I learned a bit more about how Android emulation works.
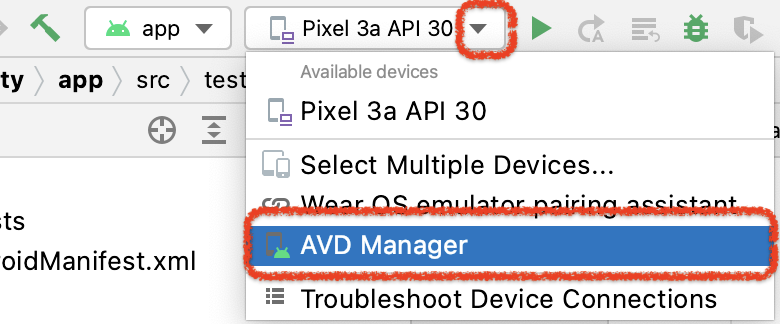
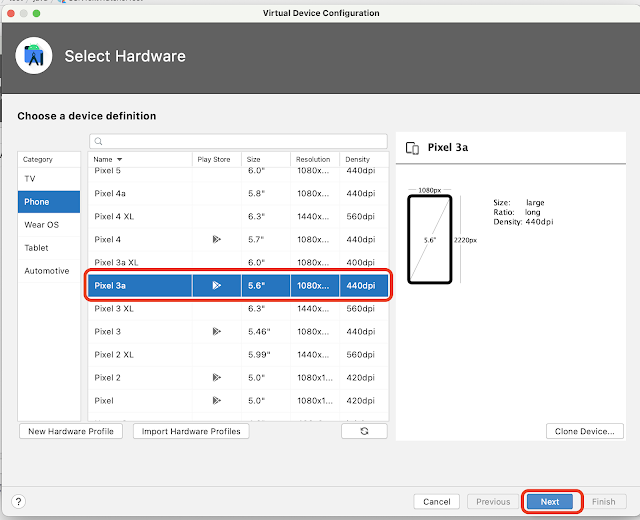
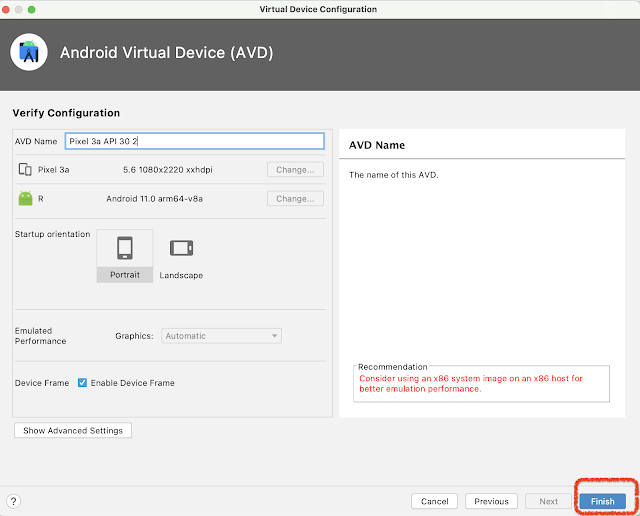
When I chose to launch my app, nothing would happen. What was happening in my case is that it was trying to launch an emulator based on the x86 architecture. So I needed to change the emulator. The following is how. There are articles on StackOverflow, Reddit, and Medium but as AndroidStudio frequently releases new versions, a lot of the information is educational but the steps are quickly out of date. (We are speeding toward the Singularity after all.)


